Get into computer sphere with some cat help
Image CC-BY-SA by iAlja on Flickr.
During this course you will learn the theoretical and technical parts by creating your own online portfolio
First of, join the CodeCatz properly
You thought we are interesting enough, that you visited us and hopefully we did not turn you away, by the heaps of chocolate we offered you.
Now is time for you to tell the whole wold you are now a CodeCat and that is why we want you to put your lovely little face on the front page of this course.
For this you'll need an account with Github. If you don't have one, now is the best time to create one. Go ahead and then come back.
This course is built using GitHub Pages.
To be presented as a proper CodeCat you'll need, to know a bit about git.
OK, you will need to know quite a lot about git, but hey no worries, we are here to get you started. For now you'll just need to know how to fork repository , how to add your lovely picture to this course and how to send a pull request, so we can publish it. Then we party!
Let's start
Now that you have your account on Github you can get a copy of the code that is in this course directly to your Github (we know you don't know what we just said, but do not worry about it now). No, no copy and paste...yet.
Some of the technical things may be challenging or frustrating, but by tackling it bit by bit and asking your peers for help, you’ll soon be an expert and helping other people. We promise!
Tweak a few items.
In your Github space there is a repository called "get-codecatz-smart". Click on it and don't get intimidated by all the items you see inside. You do not need to know what they are just yet.
Find this file
_data/course.ymlOn the top right you will see a button  , by cliking on it you are able to edit
this file.
, by cliking on it you are able to edit
this file.
Where it says "signups" add your own data. Careful, data has to be in the same format as all of the other is already. That means you have to watch out for the whitespaces, they are important.
Example:
- name: Blink TheCat
image: http://path/to/the/image
twitter: blink
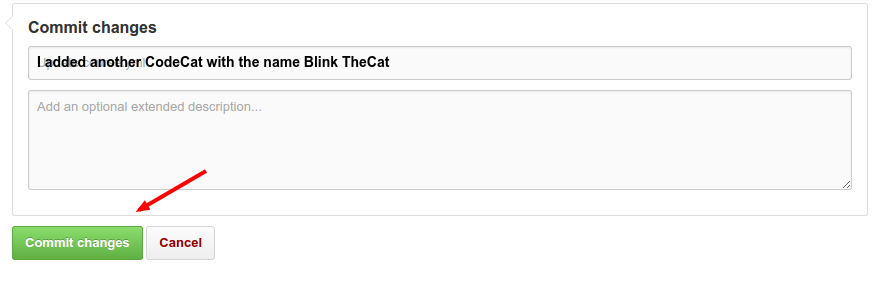
github_username: blinkAfter you are done adding you info you will need to commit this change. That is just a fancy way of saying you are saving the change you made.
On the bottom of the editor, there is a space, where you describe what your change is about. The description does not need to be very long, but it is a good practice to put something descriptive.
Send your first pull request.
Now this is the change that you did in your own repository, which is only a clone of the main CodeCatz repository. The change you made is reflected on your repository, but the main one does not know anything about your changes (how rude, but hey that is life...).
So we have to tell the main repository you have made something new and you think it could be interesting for it. To let the main repository see the changes you made, we will need to send a pull request. That means we will request that the main repository pulls our changes into itself and display your lovely image.
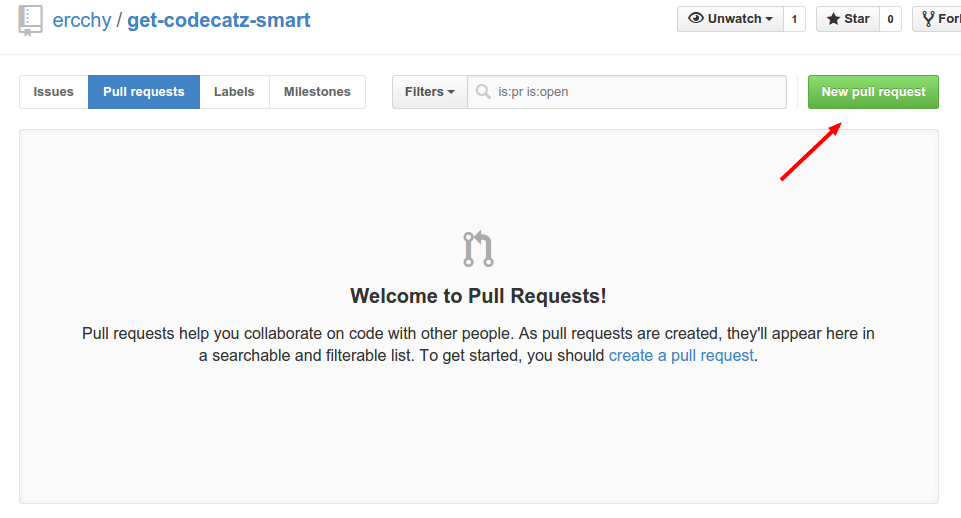
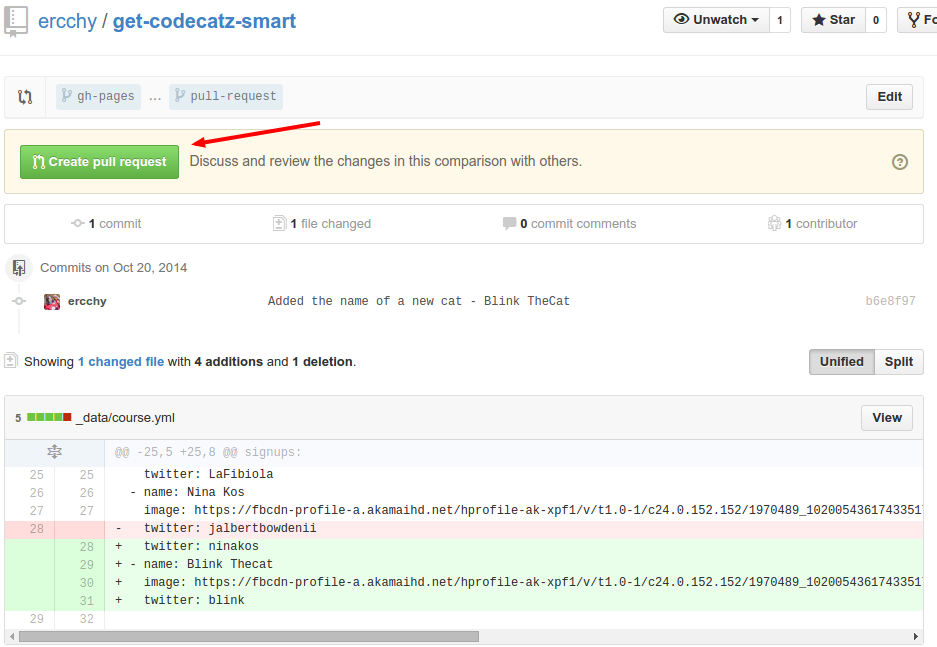
First press this button on the right side 
The page for the pull requests opens up and there is a new button that you'll need to press.
Now you can review the changes you made. The green lines is everything you added and the red ones are everything you deleted or changed.
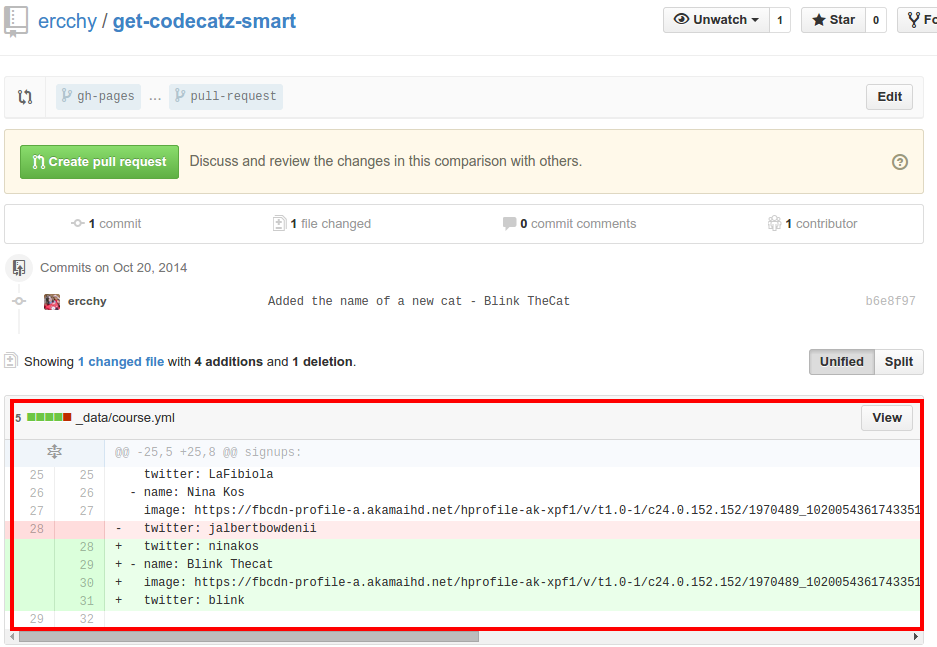
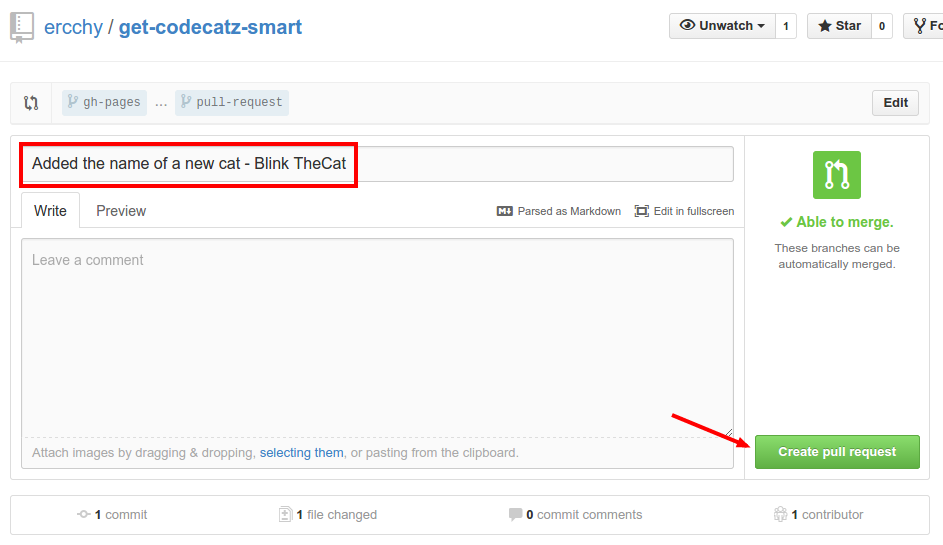
After we reviewed all the changes we have made we are going to have to press the green "Create pull request" button yet again. Yeah it takes a lot of convincing, we know.
You will see that the description of your commit is automaticaly set into the title input box, and you can leave it as it is, or you can change it if there is something else you would like to say to the people who will look at your pull request. We will leave it as it is now, because it is descriptive enough. And will yet again press the big green button. This is the last time, promise!
Now we see the summary of our pull request.

Bravo! You've send your first pull request. have yourself a treat. We will not judge.

What now?
Now we have to sit around and wait for the people who are maintainers of the main repository look at our pull request and merge it.
After they will do that:
Ta-da
Recap
You have just sent your first pull request. This means that now you need to start learning for real.
